Sunday, October 29, 2017

Day 8: Getting to the rot!

Today was spent working on getting to the rot. After removing the lower skin on the left side I continue to be amazed that the camper made it home in one piece!  The back corner has nothing holding it!   We figured out what thickness of plywood we need to repair the floor and how it was all originally assembled.  Now we will be able to start the reconstruction of the structure!  Right now I feel like we are working on a house of cards! LOL! 
Oscar over saw todays progress while sunning himself! 

Working on getting the screws out of the skin...

Removing the first section of skin revealed the back end just hanging
because the structure is rotted through!

When you do not have a bit that fits the trailer screws...
you turn them into flat heads!

The skin comes off faster with two drills working at it!

I think the walls are a little drafty!

Removing the last of the J rail for the day!
Getting ready to button up the camper for the day! 

Monday, October 23, 2017

Days 6 & 7: The Last of the Demo and the Tarp

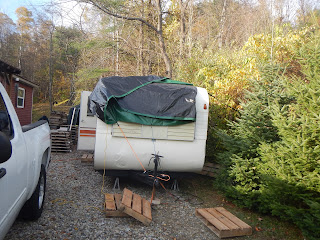
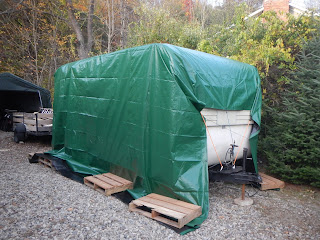
My Dad helped me work on the camper!  Once again he pulled out his tools!  We removed the furnace which revealed another nest!  The bunks, that someone added, came out hard as with the wall that separated the bathroom.  This revealed a soft floor and rotted wood in the walls that could be sucked out with the vacuum!  Once the rest of the ceiling was dropped we started to build a temporary support for the roof.  We cut out the new roof joists and slid them in place next to the old ones.  Then we removed the rotten ones.  Now, with the support in place, I feel a lot better knowing the first snow storm we get will not pancake my poor little camper!  We removed one of the windows that at this point was just barely attached and checked out the floor in the front.  It looks like the floor will have to be replaced down both sides and in the front and back.  The last thing we did was wrap the camper up in a very large heavy tarp to protect it from the elements as we continue to work on it.

Removing the vent to the furnace...

Removing the rest of the built in around the furnace.

As we pulled out the furnace it revealed another large nest!


Removing the nest!

Dad with his tools!  Getting ready to remove the built in bunks!

No more privacy! LOL :) 

Dropping the ceiling...

An example of the rotten framing in the rear of the camper... not to bad considering its age...

cutting the new roof joists...

The new roof joists in place with the temporary support..

another view of the temporary support...

The first of the windows removed!  See that pretty blue? That is what color the stripe originally was on the camper!

Covering him with the tarp!

All tucked in awaiting for another day!

Thursday, October 19, 2017

Day 5: The Before Painting

 Today we did not work much on the camper but we did go out to pick up a tarp that will cover it.  We also disinfected all of the framework of the cupboards so we could bring them into the workshop to use as templates.  It will be much easier to go by these then trying to build them from scratch!   Of course before we put a tarp over the whole camper I had to do a before painting! When we are all done I will paint an after painting and they will both find a home in my camper!


I had a blast painting a picture of my camper!

Can't wait to paint the after painting! 

All of the frame work disinfected and ready to move into the shop!  Hard to believe this all came out of my camper!

Day 4: Removing the Kitchen Cupboards and Dropping The Ceiling!

Well, today we were very productive!  Mom and I managed to remove the cupboards from the kitchen... It took awhile because of the gas lines, water line, and electric cords that all had to be removed or cut around.  Once the cupboards were out we peeled back the paneling and found that the whole side of the camper had been used by mice as a nest...they had chewed up all of the insulation and had rotted the wood with their pee! Yuk!  We also found out why the side of the camper was leaning out.  Most of the studs in that side are cracked from where the factory had notched out for the electric wires.  When Dad came home he helped us drop the ceiling and we found that the roof rafters were not even connected to anything! WOW! It is amazing to me that the trailer had not pancaked along time ago! I guess the aluminum siding must be strong! LOL! The last thing we did was go to the lumber yard and picked up our first new wood for the repairs! Yay!

Off with the counter top!

I am no electrician but I was able to figure out how to remove the electric cord from the box that was preventing us from removing the cupboard!

Yes! The cupboard is removed...

We were able to get it out in mostly one piece!

The yuk we found in the wall... look at that chewed up insulation!

down with the upper cupboard!

getting ready to pull the ceiling down....

...And it is down!

At this point we will be able to start reconstruction...

The first lumber for my camper!  can't wait to get started! :D 


Wednesday, October 18, 2017

Day 3: Removing The Kitchen

Well, I had to get the big guns out for this part...aka Dad with his tools! LOL  Needed some help from someone that had more knowledge and muscles to be able to pull this one apart!
The Sparks were flying!

unwiring  the hood

Taking the gas light down!

Removing the sink!

Pulling the oven out after undoing the gas lines...

Success the Oven is out!!! Yay!

Next... the Cupboards...

Monday, October 16, 2017

Day 2: Start of the Demolition!

Well we had to get our tools and muscles warmed up for this part!  The Demolition went pretty well on the door side of the camper.  We got the lights taken out and boxed up to keep them safe.  We removed the frame work to the couch and the upper cupboard.  Then we striped the wall down to the studs and removed all of the old insulation.  To our surprise the rot is not as bad as we expected on this side of the camper!  The other side of the camper will probably be another story... That will have to wait for another day! 
 
Mom working on one of the lights..


taking out another light...

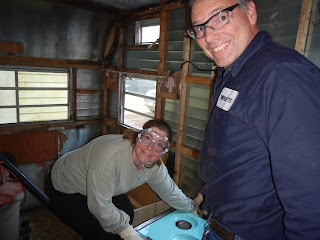
Out with the couch!  I can't smile with goggles on! LOL

Working on getting the cupboard down...

It was all put together with staples, glue, and screws!

Success, it is down!!!

Time to peel the wall off...

out with the old insulation...

Oscar checking out the progress... :)

Well,  it has been awhile since I have posted!  Things moved along very quickly as we were finishing Susie up!  Life got busy and we have tr...